Linux (Ubuntu) Virtual Machine
A Linux Virtual Machine (VM) is a virtualized instance of a Linux operating system running on a host machine within a virtualized environment. It's created using virtualization technology that allows multiple operating systems to run simultaneously on a single physical server or host machine.
Log in to Azure Portal:
Open your web browser and log in.
Sign in with your Azure account credentials.
Create a Virtual Machine:
Click on "Create a resource" (+) button at the top left-hand corner. Click create. Fill in your project details (Subscription, Resource group & Region)


In the search bar, type "Virtual Machine" and select it from the dropdown.

Details Configuration:
Click "Create."

Basic Settings:
Choose your subscription and resource group.
Provide a name for your VM.

Choose the region closest to you or your users. Choose the Availability option.

Select the Linux distribution you prefer (such as Ubuntu, CentOS, Debian).
Choose the appropriate image.

Select the machine size based on your requirements (standard, performance, etc.).

Administrator Account:
Enter a username for the administrative user account.
Set a password or SSH public key authentication method.
SSH keys offer enhanced security compared to passwords.

Disk:
Choose the appropriate OS disk type (SSD locally redundant storage).

Networking (Optional):
Choose the appropriate Virtual Network settings.
* Configure the subnets, public IP settings, network security groups, and monitoring settings.
Management (Optional):
- Configure various management options such as monitoring, diagnostics, and auto-shutdown policies.
Advanced Settings (Optional):
- Configure extensions, automation scripts, or custom scripts.
Tags (Optional):
- Assign tags for better resource organization and management.
Review + Create:
Review all the settings you've configured. Wait for validation.
Click "Create" to start deploying your Linux VM.

Download the RDP files(.pem).

Accessing the Virtual Machine:
Once the deployment is complete, go to your newly created VM in the Azure portal.
Use SSH or RDP (Use SSH if you are using PowerShell) to connect to your VM.

Copy down the username and ip address.
Connecting via PowerShell:
PowerShell is application you can search for on your windows search bar.

Type "ssh -i (paste the RDP-file url) (paste username**@**paste ip)". press enter the yes.
(ssh -i C:/Users/rfadiora/Downloads/TechHack_key.pemazureuser@51...). See sample but do not copy.

Congratulations, you're connected. I trust this comprehensive guide has been helpful in creating your Linux virtual machine. Thank you for engaging with this tutorial!
Deleting a resource group, including the associated VM and other resources within Azure:
Sign into Azure: Log in to the Azure portal at https://portal.azure.com.
Navigate to Resource Groups: On the left-hand side, select "Resource groups" from the Azure portal's menu.

Select Resource Group: Choose the specific resource group containing the VM and resources you want to delete.
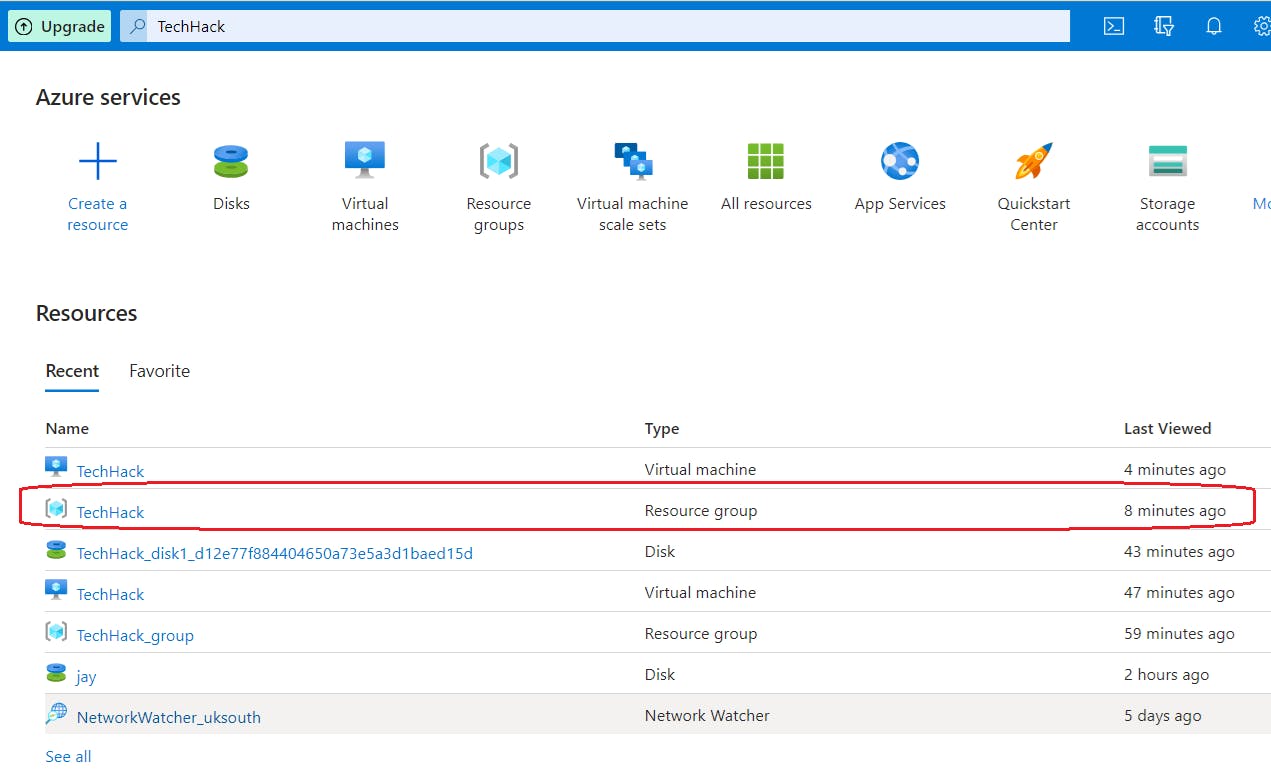
Review Resources: Inside the selected resource group, review all the resources associated with it. Ensure you're aware of everything that will be deleted.
Start Deletion: Click on the "Delete resource group" button at the top. You might be prompted to confirm the deletion. Review the information and confirm the action.

Confirm Deletion: Azure will display a confirmation dialog to verify if you're sure about deleting the resource group and its contents. Review the details and type the resource group's name to confirm the deletion.
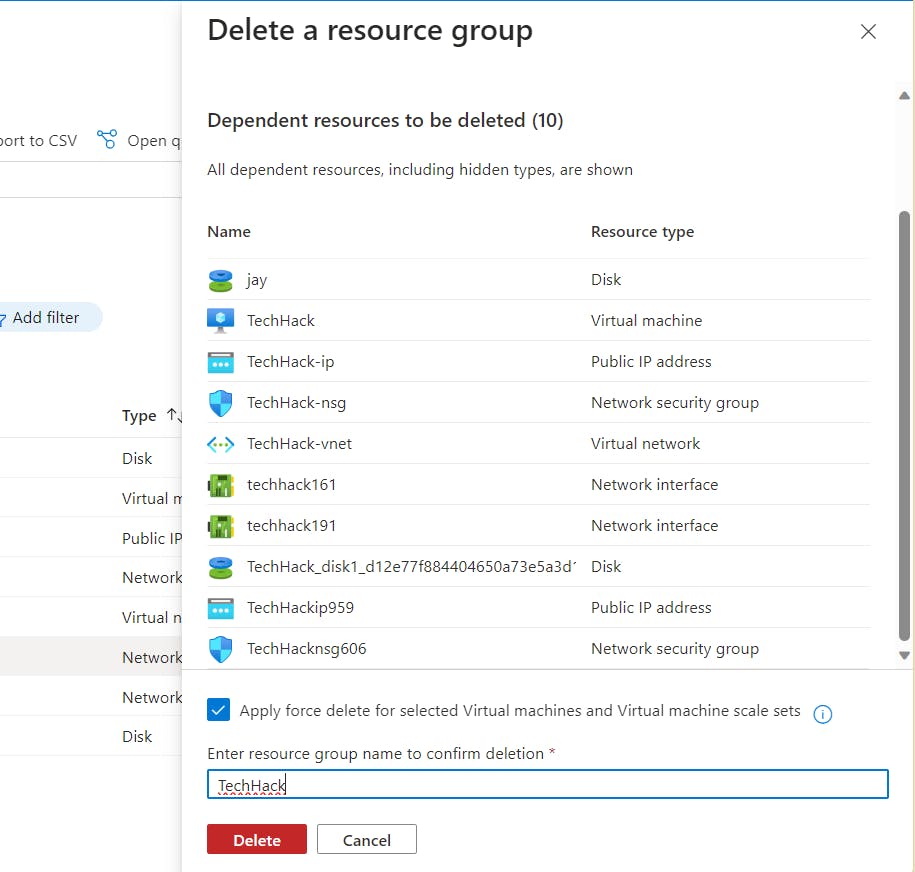
Initiate Deletion: Click on the "Delete" button to initiate the deletion process.
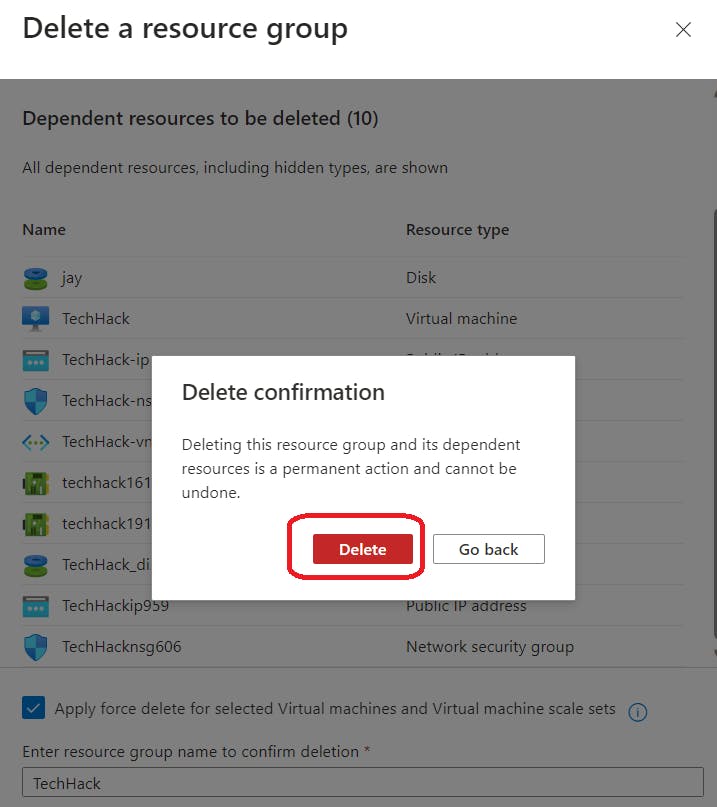
Monitor Deletion Progress: Azure will start deleting the resource group and all associated resources. Monitor the progress on the Azure portal's dashboard. It might take some time, depending on the number of resources.
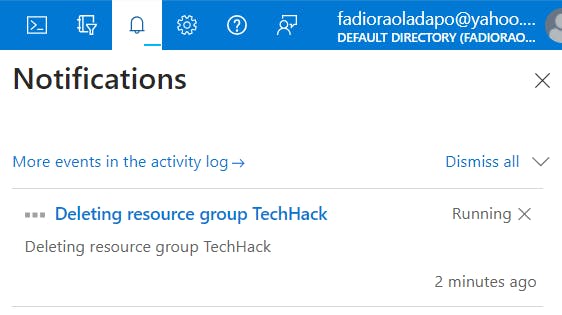
Verification: Once the deletion process is complete, verify that the resource group and all resources within it have been successfully deleted.

If you've followed these steps, your resources should now be successfully removed, helping you avoid unnecessary charges. Remember, managing your resources efficiently contributes to optimizing your Azure usage and costs.
