

Introduction.
In today's digital landscape, hosting a static website on Azure Blob Storage is an efficient and cost-effective solution. Azure's versatile storage accounts provide an easy-to-use platform for serving static web content.
Whether you're a developer, small business, or individual looking to share information online, this step-by-step guide will walk you through the process of creating, deploying, and managing a static website on Azure.
Let's dive into the world of cloud-based hosting, where scalability, reliability, and accessibility come together to enhance your web presence.
Requirements Before you can proceed with deploying a static website using Azure storage, ensure you complete the following prerequisites:
Download and install Visual Studio Code on your computer.
Install the Azure Subscription, Azure Account, and Azure Storage Account extensions within Visual Studio Code.
Set up a storage account in the Azure portal.
Create a dedicated folder to store the data for your static website.
Step-by-Step Guide on Hosting a Static Website on Azure Blob Storage
Step 1: Create a Storage Account:
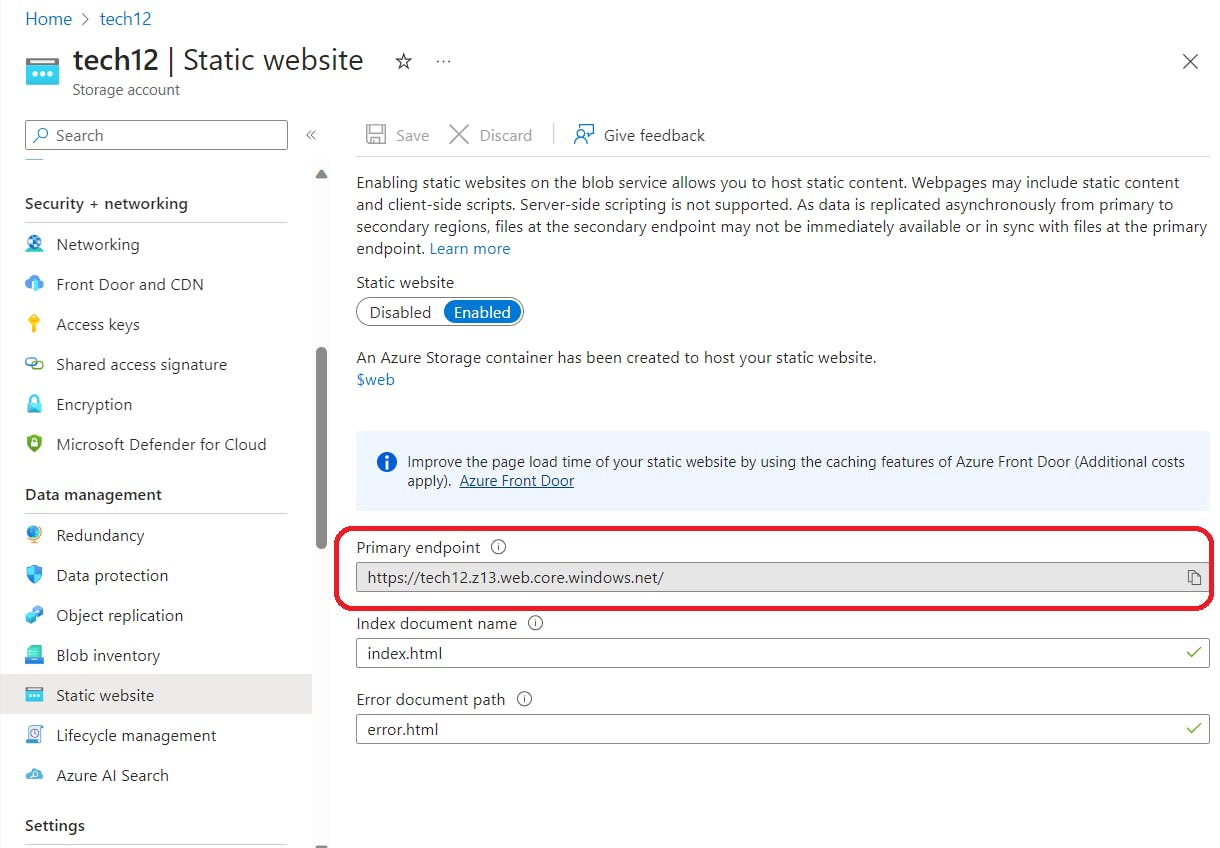
Step 2. Enable Static Website Hosting:
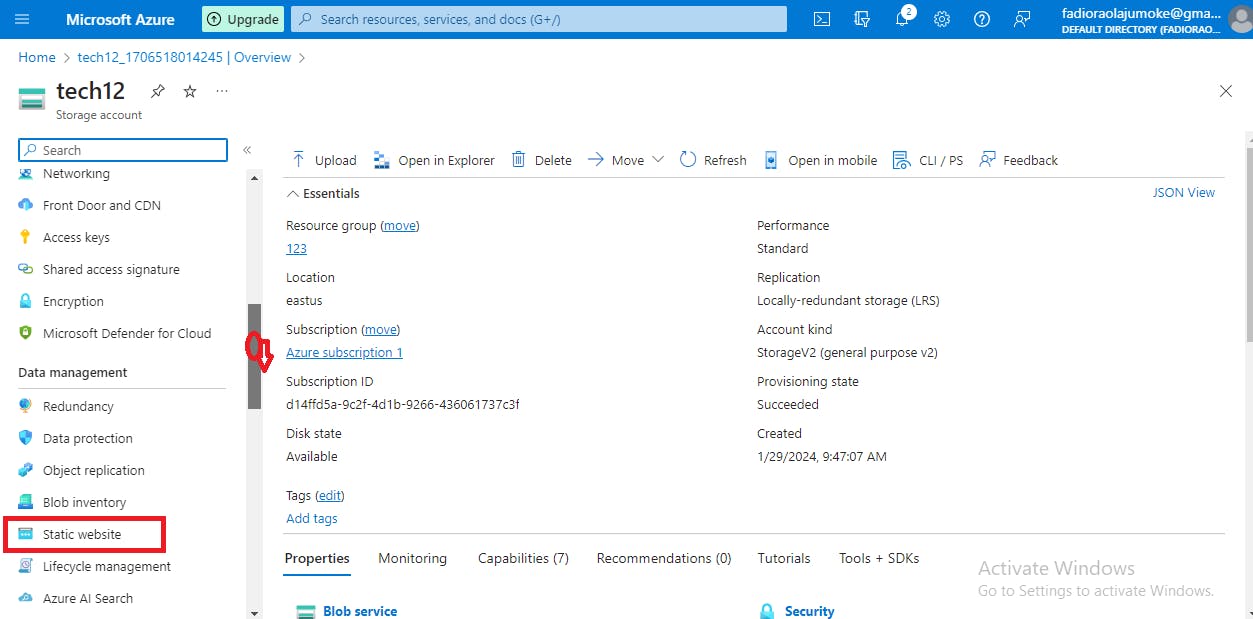
Access the created storage account, scroll down on the sidebar and click on static website.
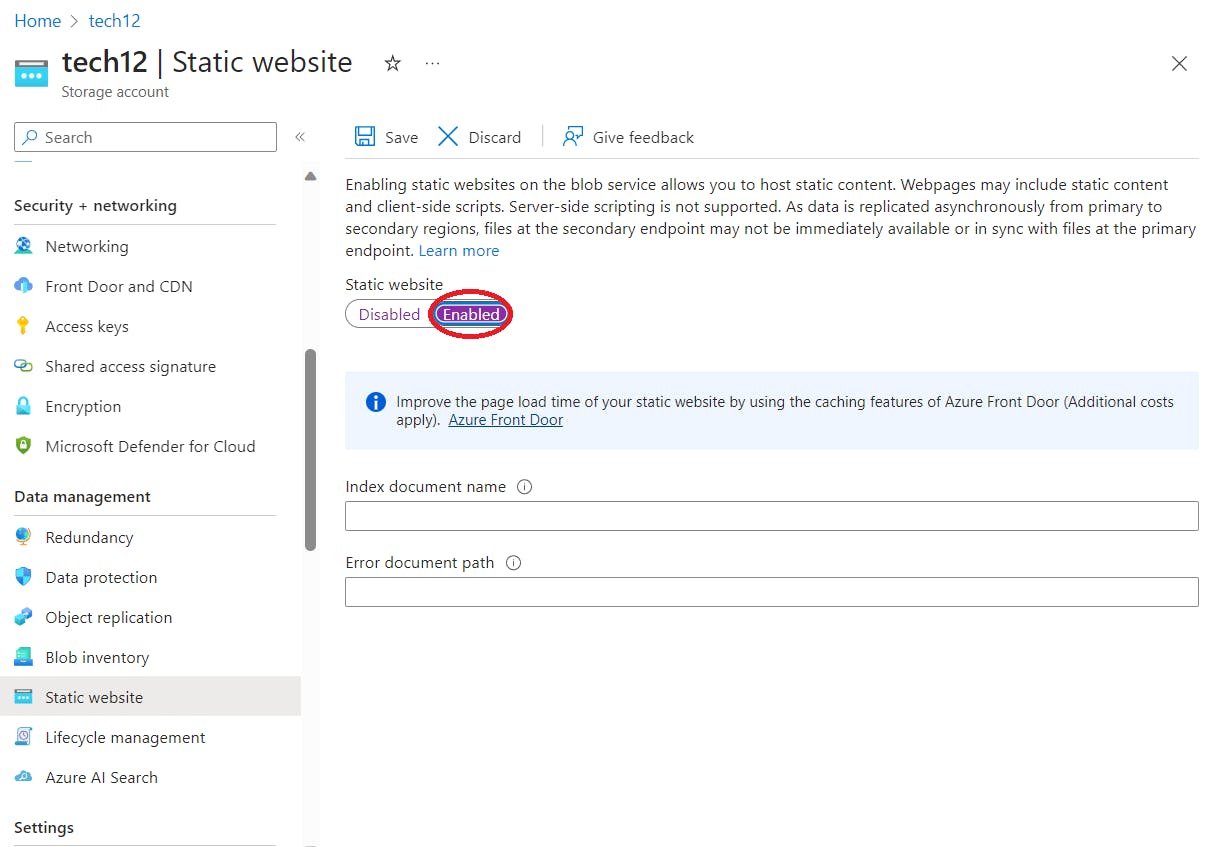
Enable static website.
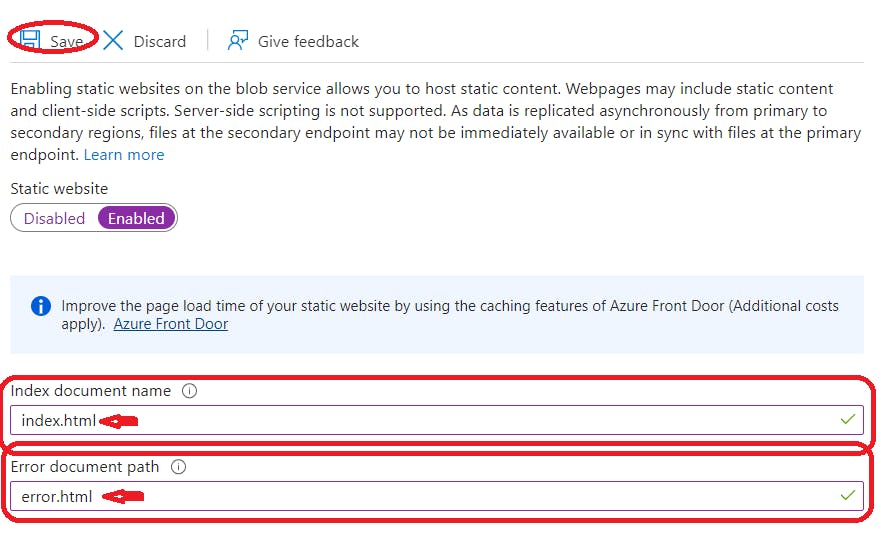
In the index document name field, input "index.html," and for the Error document path, enter "error.html." Click on "save".
A primary and secondary endpoint is generated.
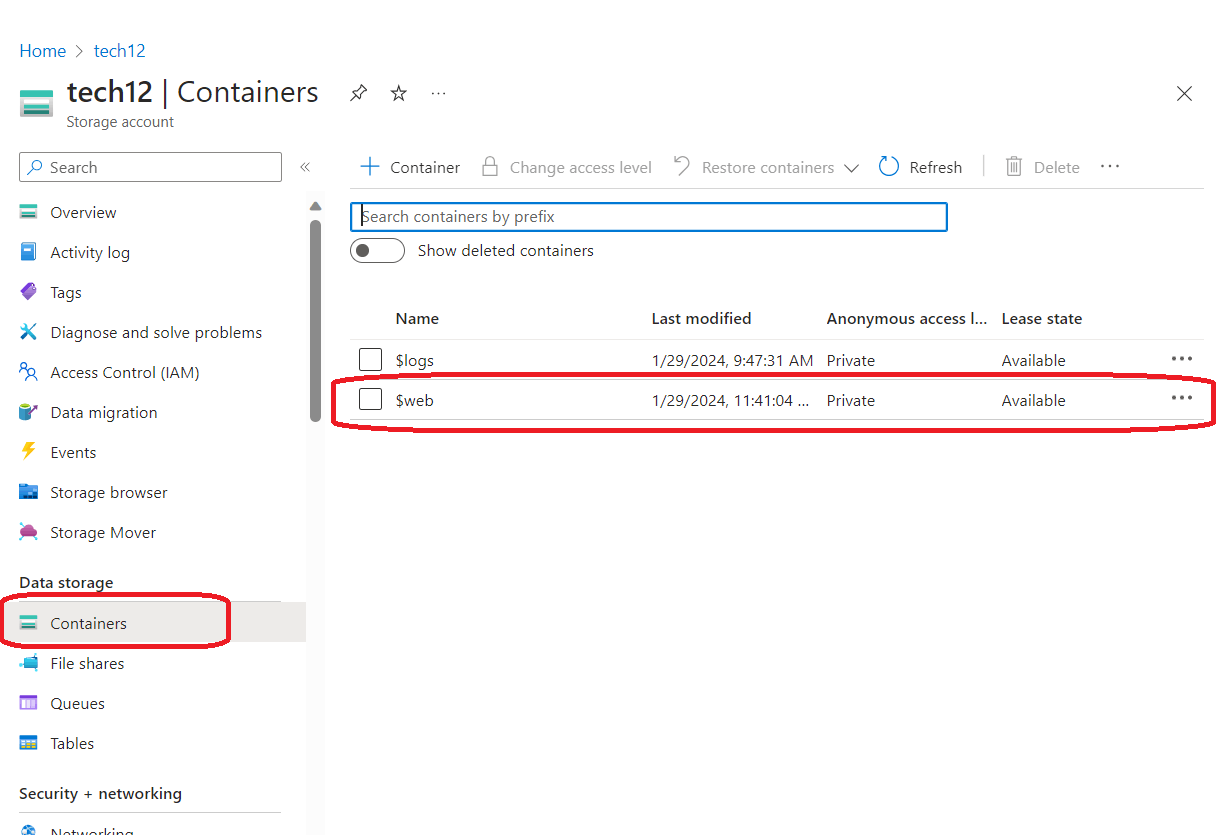
Step 3. Upload Website Content from Visual Studio:
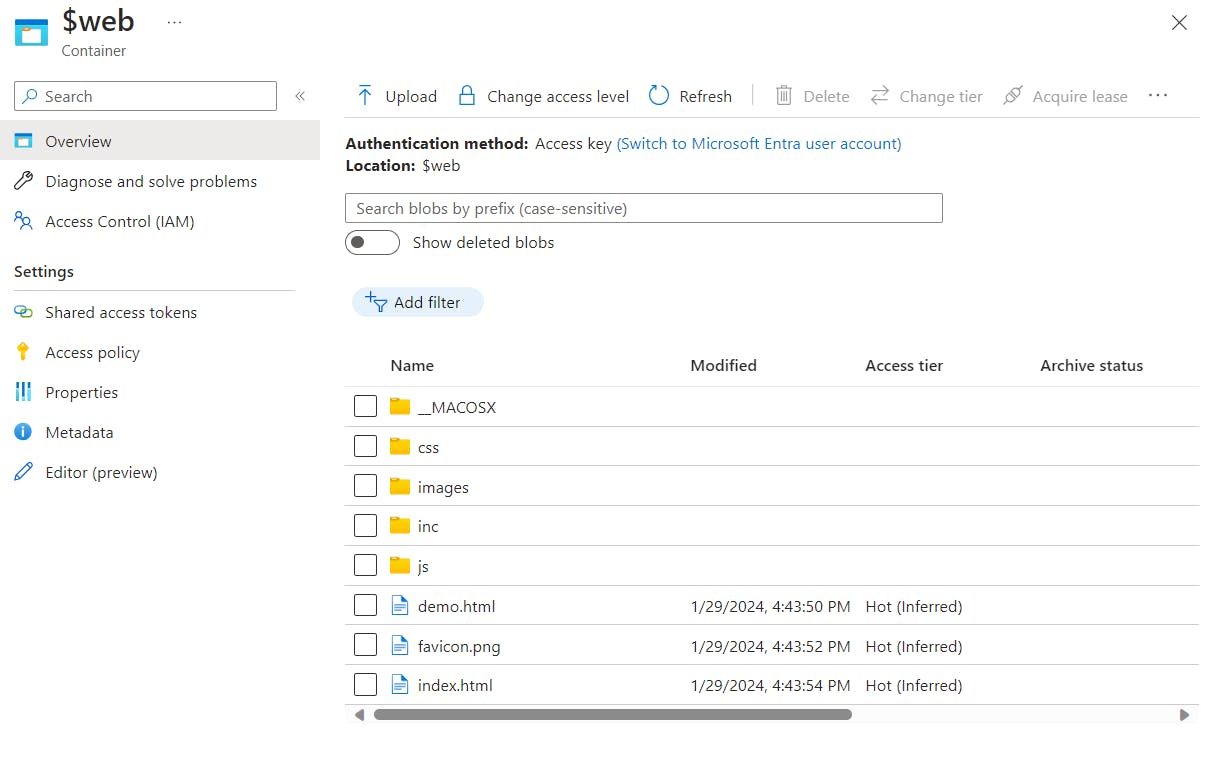
In the storage account, select "Containers" and you will see that a $web container has been created. This container house your data (code).
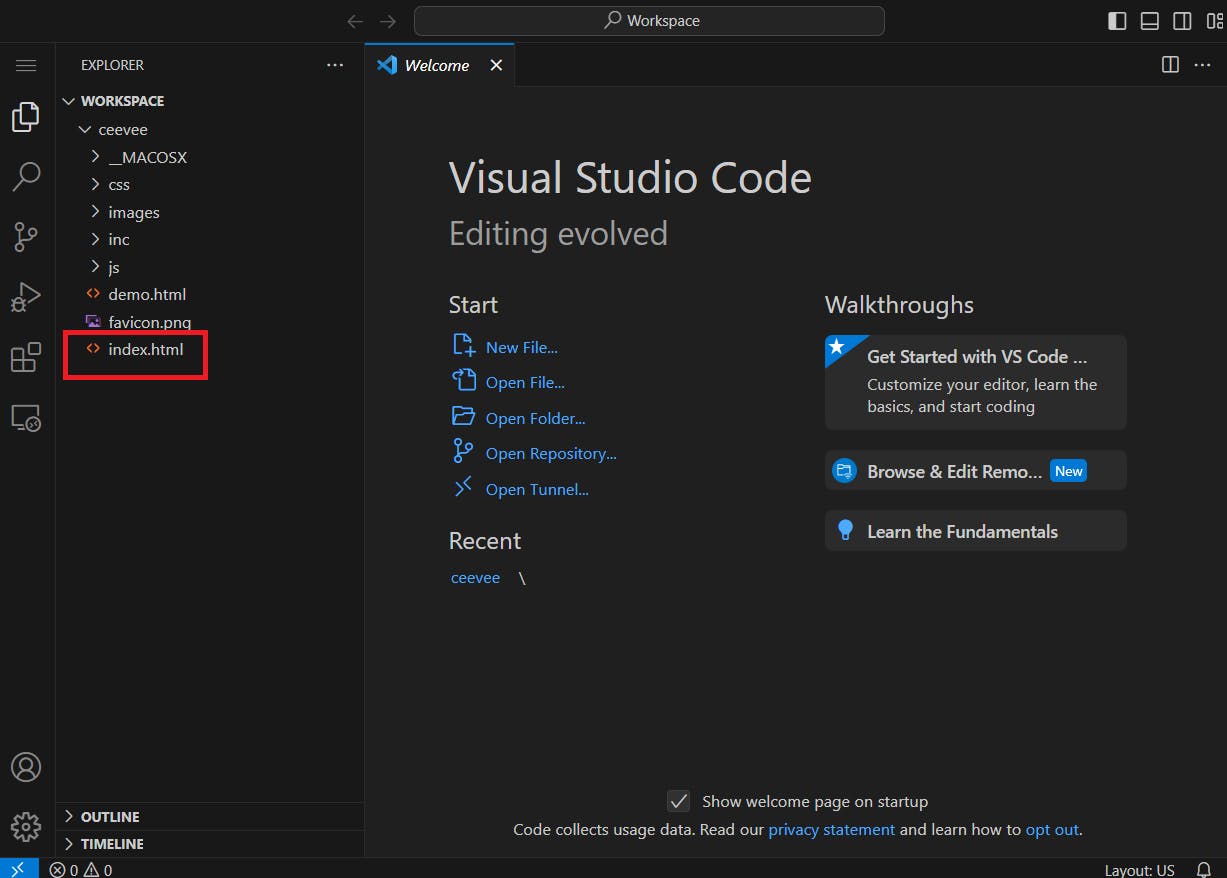
Next, navigate to the top-left corner of your VScode, click on "File," and select "Open File." Choose the folder containing your static website codes and data.

After selecting your folder, the folder appears on your Visual studio homepage, click index.html and remodify your code.
Step 4. Connect your azure account to Visual studio:
Install the Azure Subscription, Azure Account, and Azure Storage Account extensions within Visual Studio Code.
Click on the azure extension and sign in to your azure account.
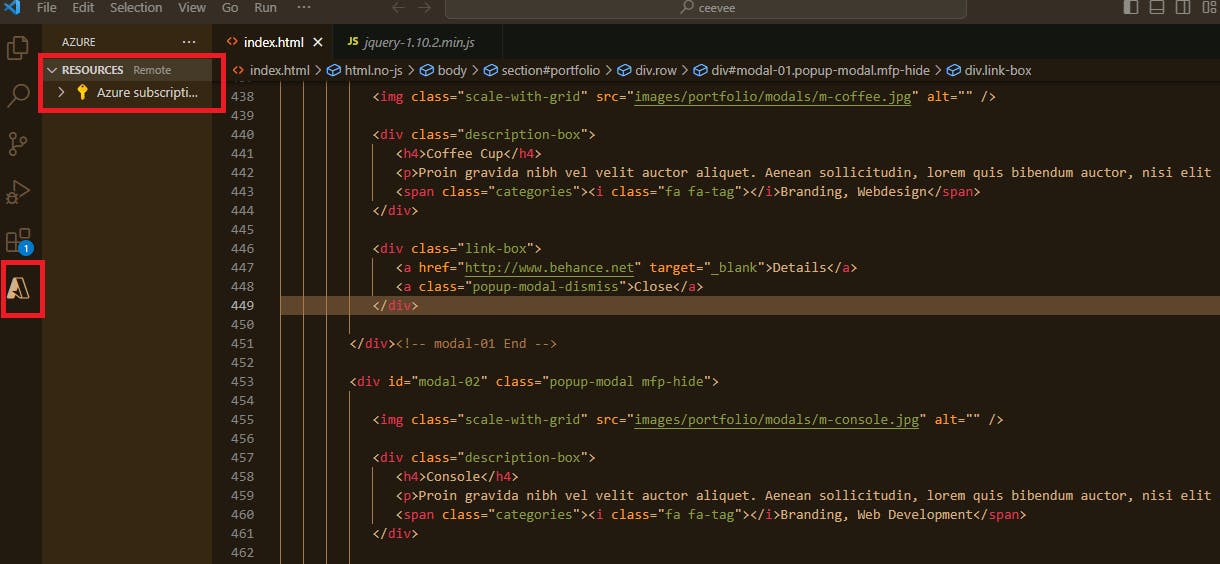
After logging in, click the azure subscription.
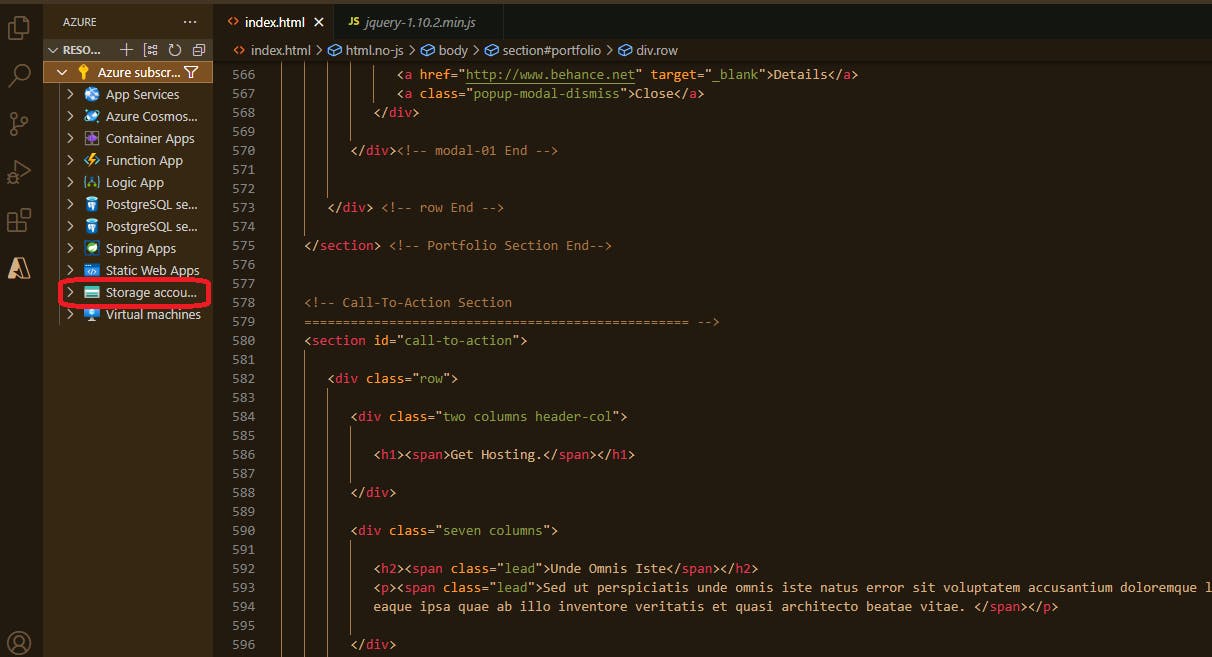
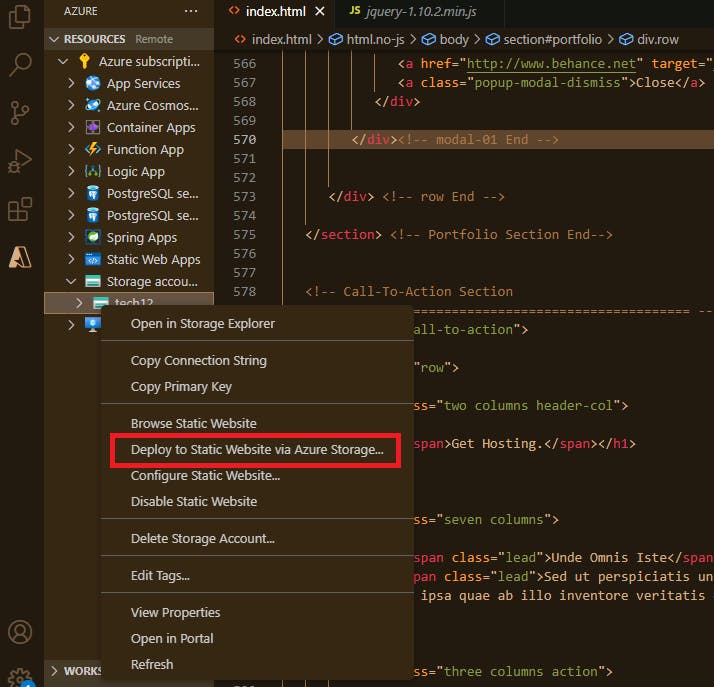
Right click on your Storage account and click "Deploy to static website via Azure storage.
5. Select and Deploy:
You will be prompted to select a folder.
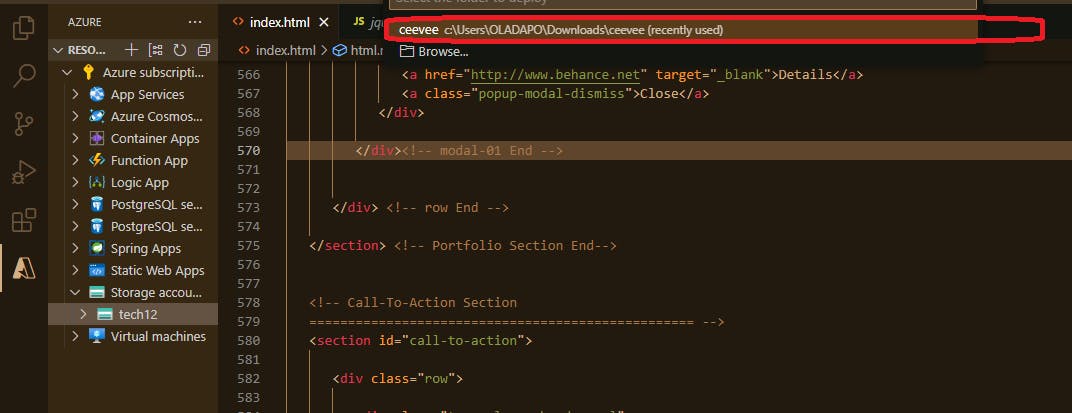
After selecting the folder, deployment will start automatically. Wait till it is completed.
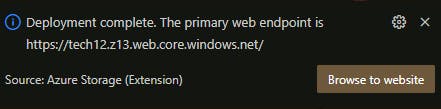
7. Access your Static Website:
Copy the primary endpoint URL and paste on your browser.
Welcome to your website.

To view the deployed data on Azure, go to container, click $web container.
If you followed the above steps, you've successfully hosted a static website on Azure Blob Storage. This cost-effective and scalable solution provides a reliable platform for your web content. For more Azure-related tutorials and insights, stay tuned to this blog. Happy hosting!