Adding and initializing a data disk for a Windows 11 Pro virtual machine on Azure


What is OS Disk (Operating System Disk)
The OS Disk stores the operating system and critical system files needed for the virtual machine to function. It's crucial for booting up and running the system.
What is Data Disk
Data Disk serves as extra storage space for storing data, files, applications, and databases separately from the operating system. It's an optional addition used for storing user-related information, providing flexibility and scalability in managing data.
Guide for adding and initializing a data disk for a Windows 11 Pro virtual machine on Azure:
Access Azure Portal: Login to your azure account.
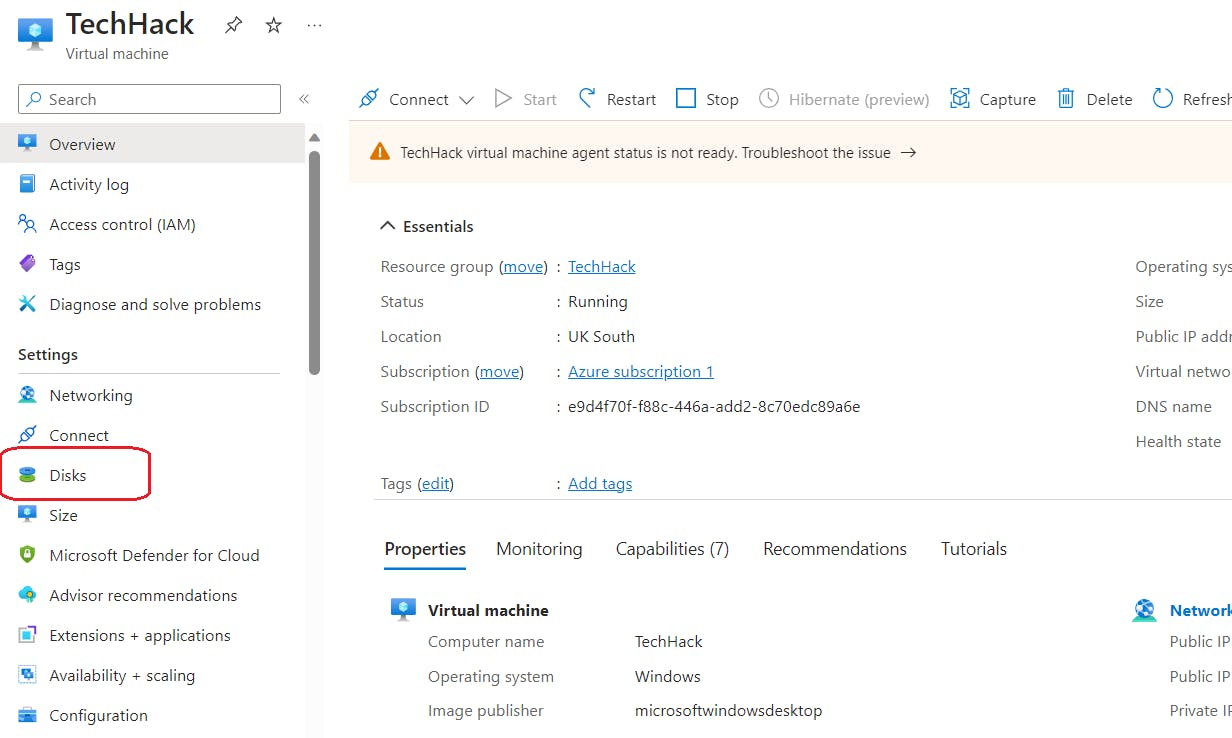
Select Virtual Machines: Navigate to the Virtual Machines section.
Choose Your VM: Select the Windows 11 Pro VM to which you want to add the data disk. click here to see how to create and connect to your VM.
Attach Disk: In the VM's menu, click on "Disks" and then select "+ "Create and attach a new disk."
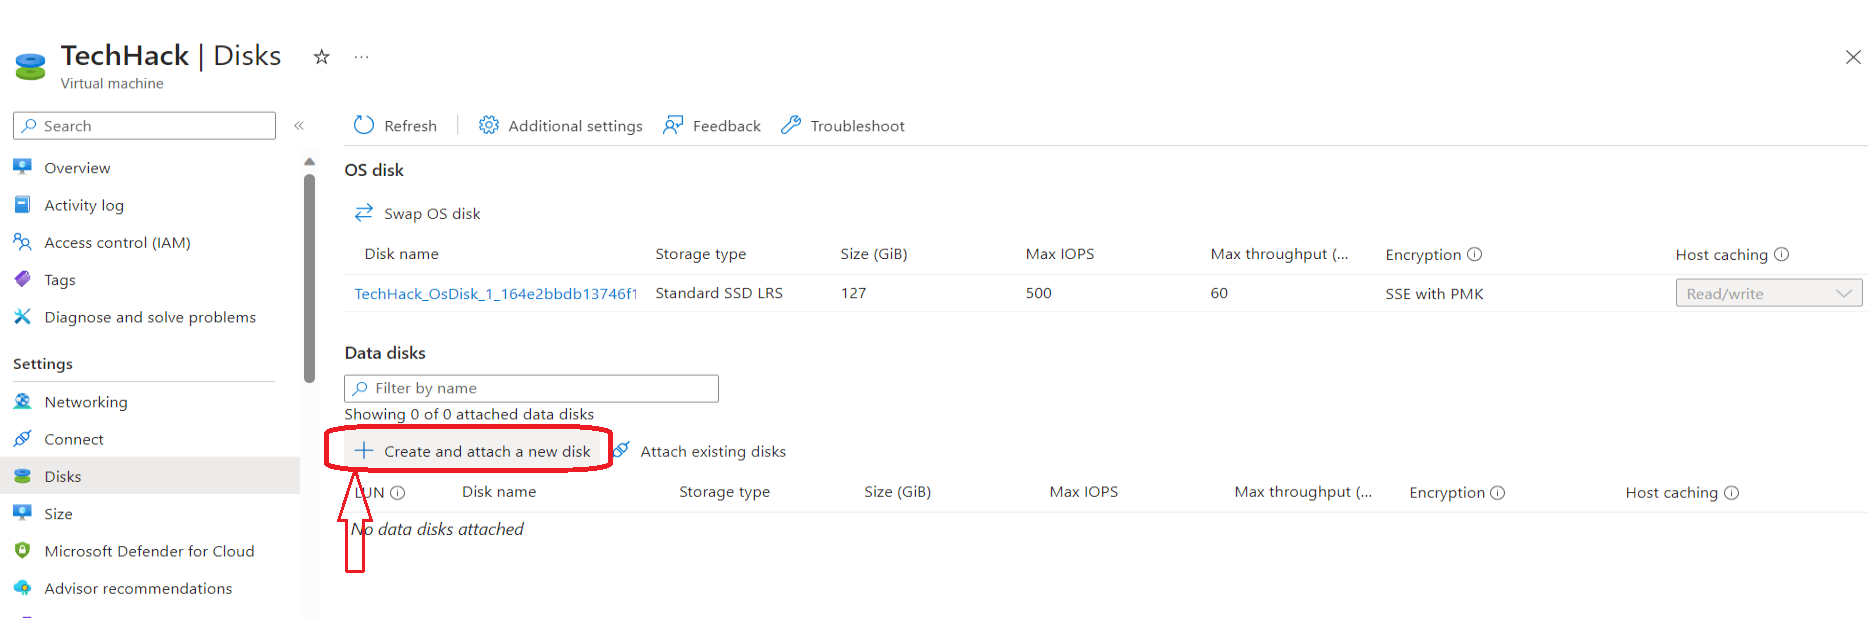
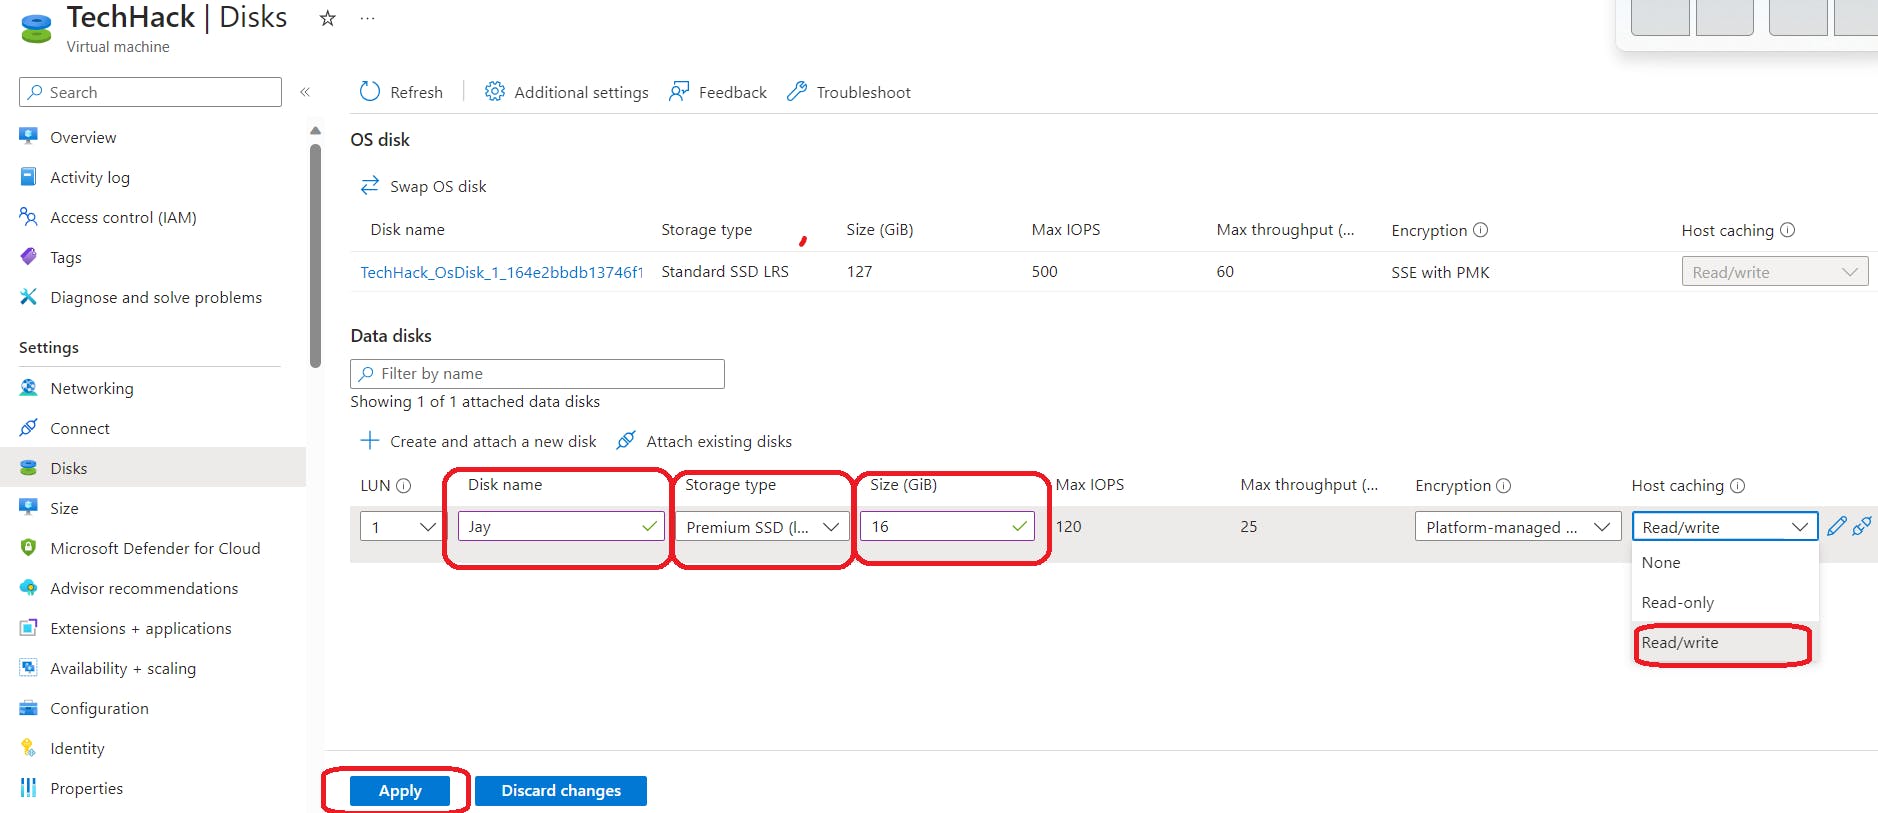
Configure the Data Disk: Enter details like the disk name, size, disk type (Standard HDD, Standard SSD, or Premium SSD), and caching preference. Click "apply."
Connect to the VM: Use Remote Desktop Protocol (RDP) to access your Windows 11 Pro VM. click here to see how to create and connect to your VM.
Initialize the Disk:
Open Disk Management by right clicking the windows button OR searching for "Disk Management" in the Start menu.
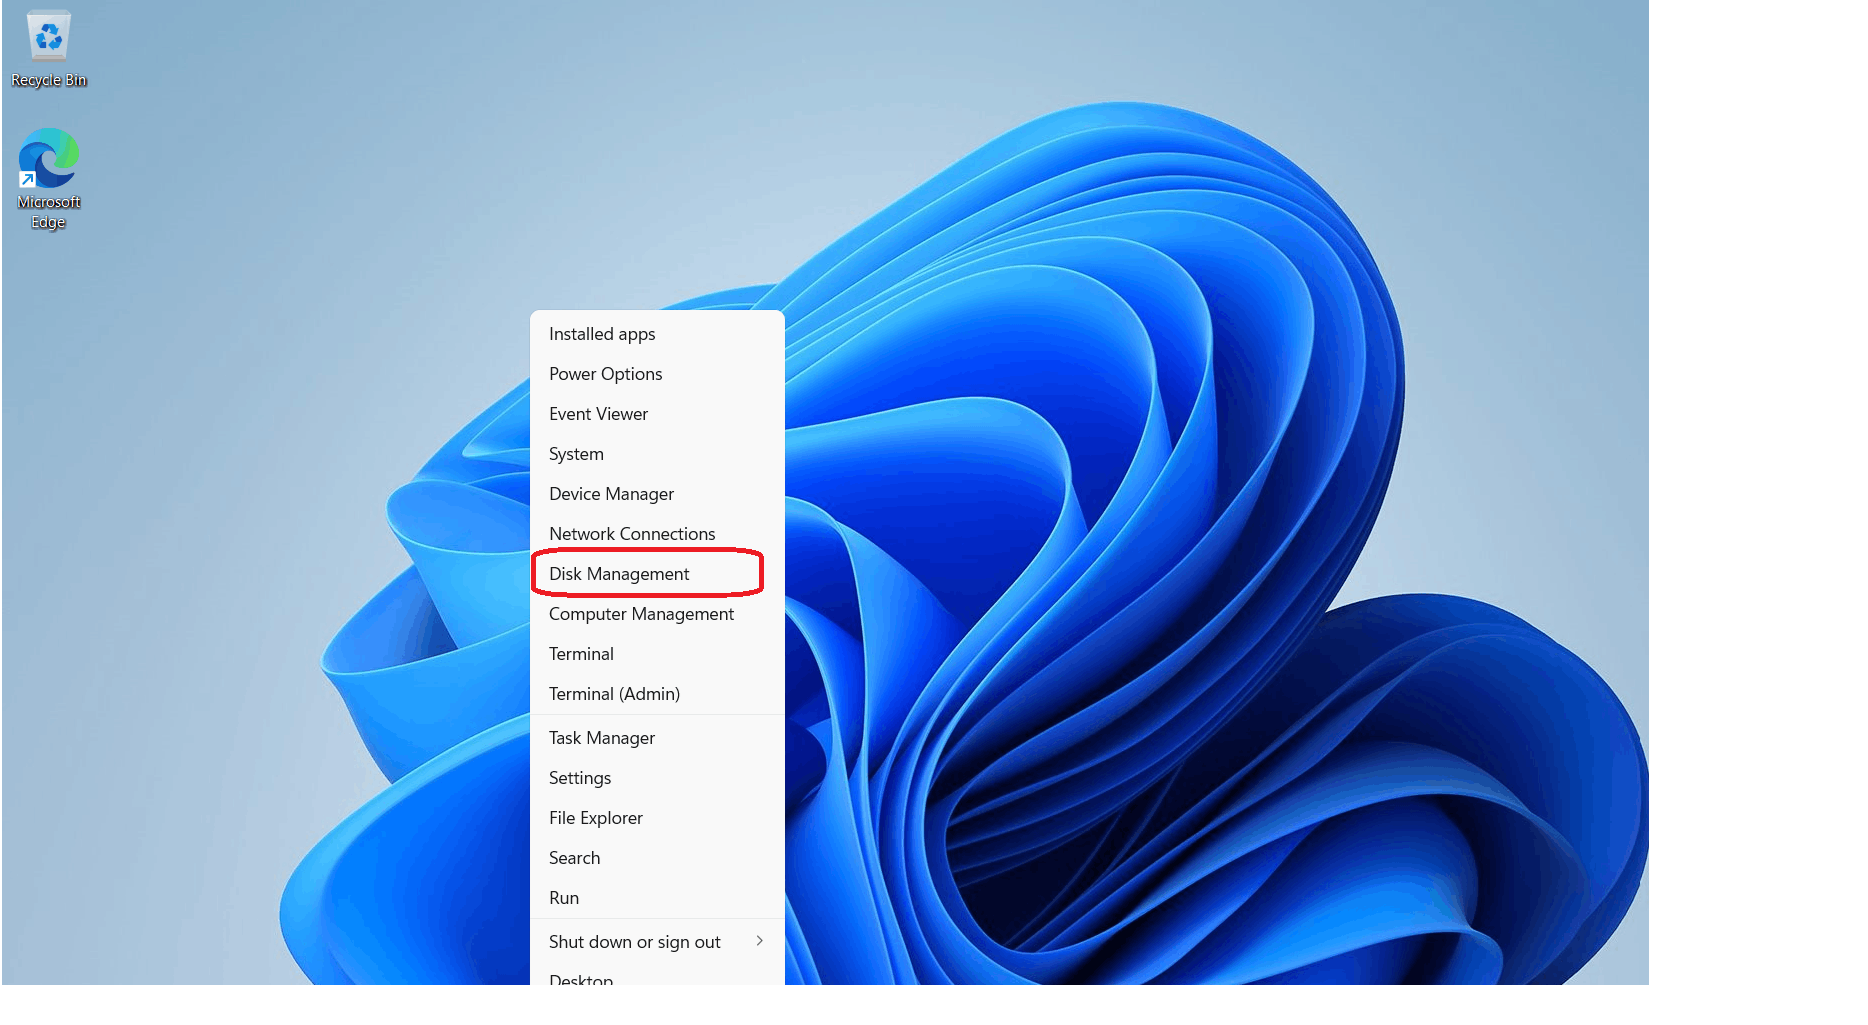
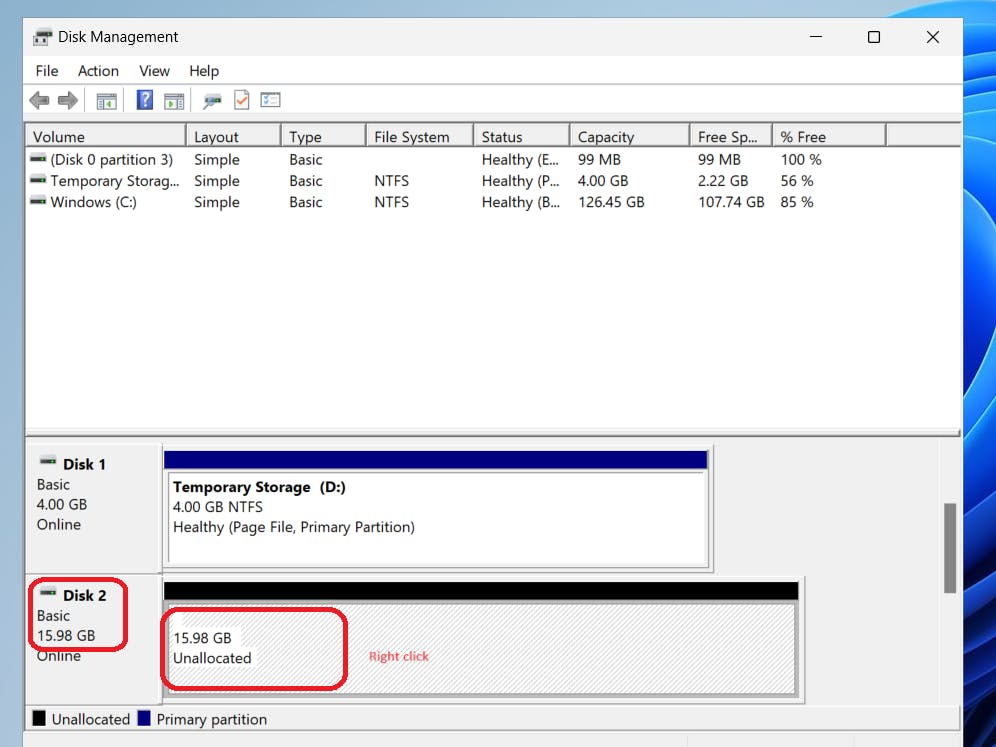
Identify the new disk (it will show as unallocated). Right click on the unallocated disk.
Create Volume:
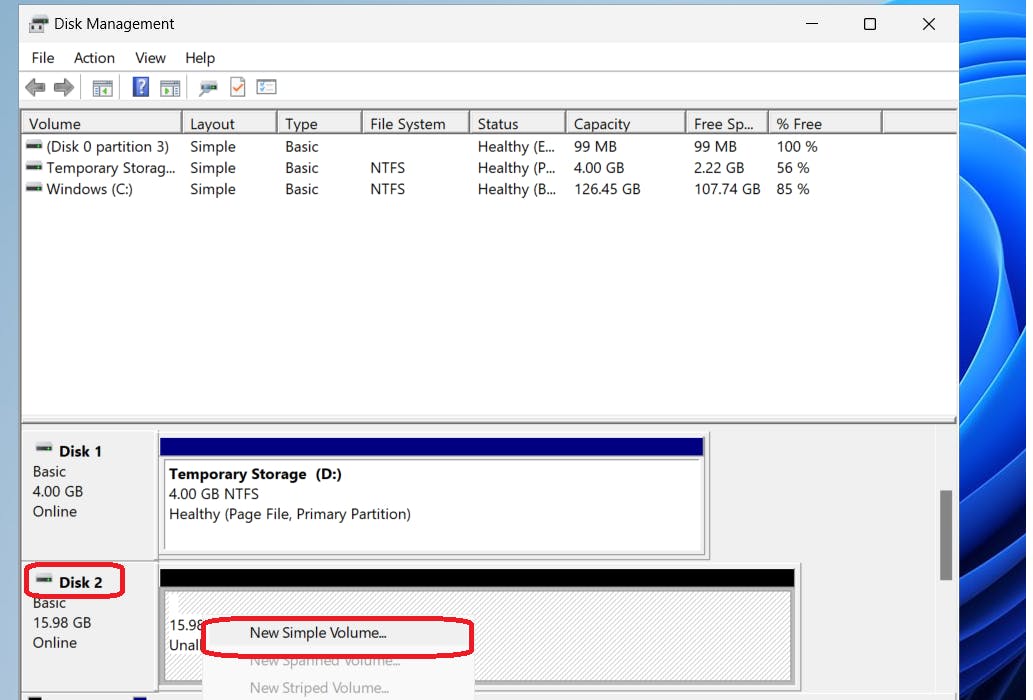
Right-click on the unallocated space and select "New Simple Volume."
Follow the wizard, assigning a drive letter, click the next button to finish set up.

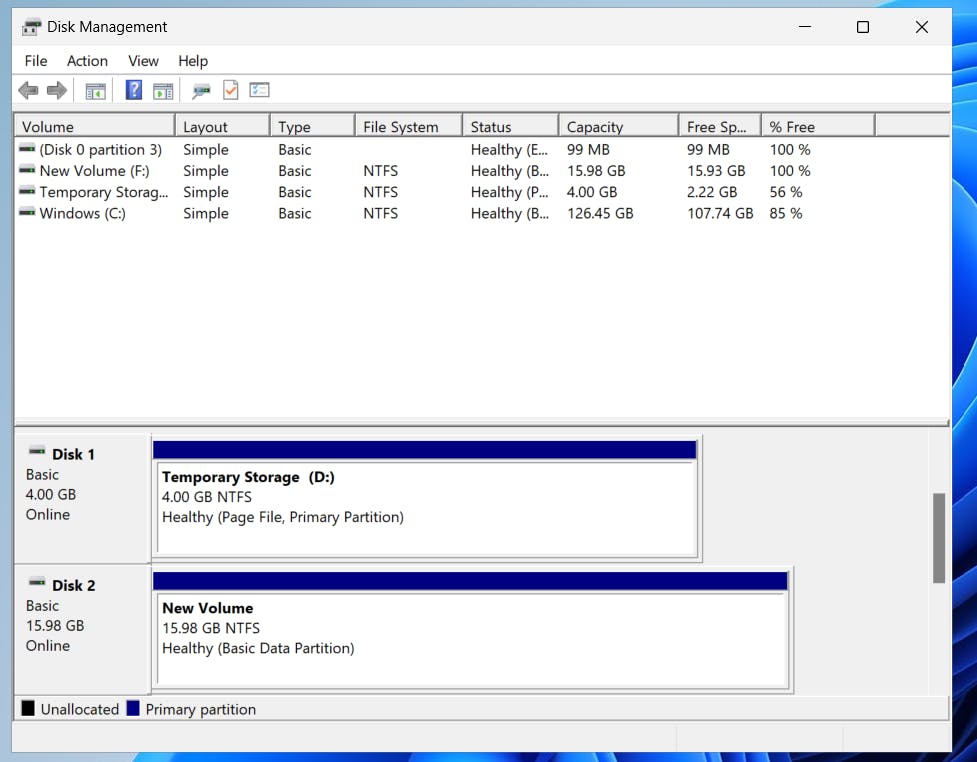
Mount the Disk: Once formatted, the disk will be available for use. You can access it via File Explorer using the assigned drive letter.

I hope this tutorial has provided a clear and straightforward process for recovering your deleted VM. Kindly subscribe to my blog for further tutorials, updates, and insights on managing Azure resources efficiently. Stay informed and empowered in your cloud endeavors!
Here's a step-by-step guide to deleting a resource group, including the associated VM and other resources within Azure:
Sign into Azure: Log in to the Azure portal at https://portal.azure.com.
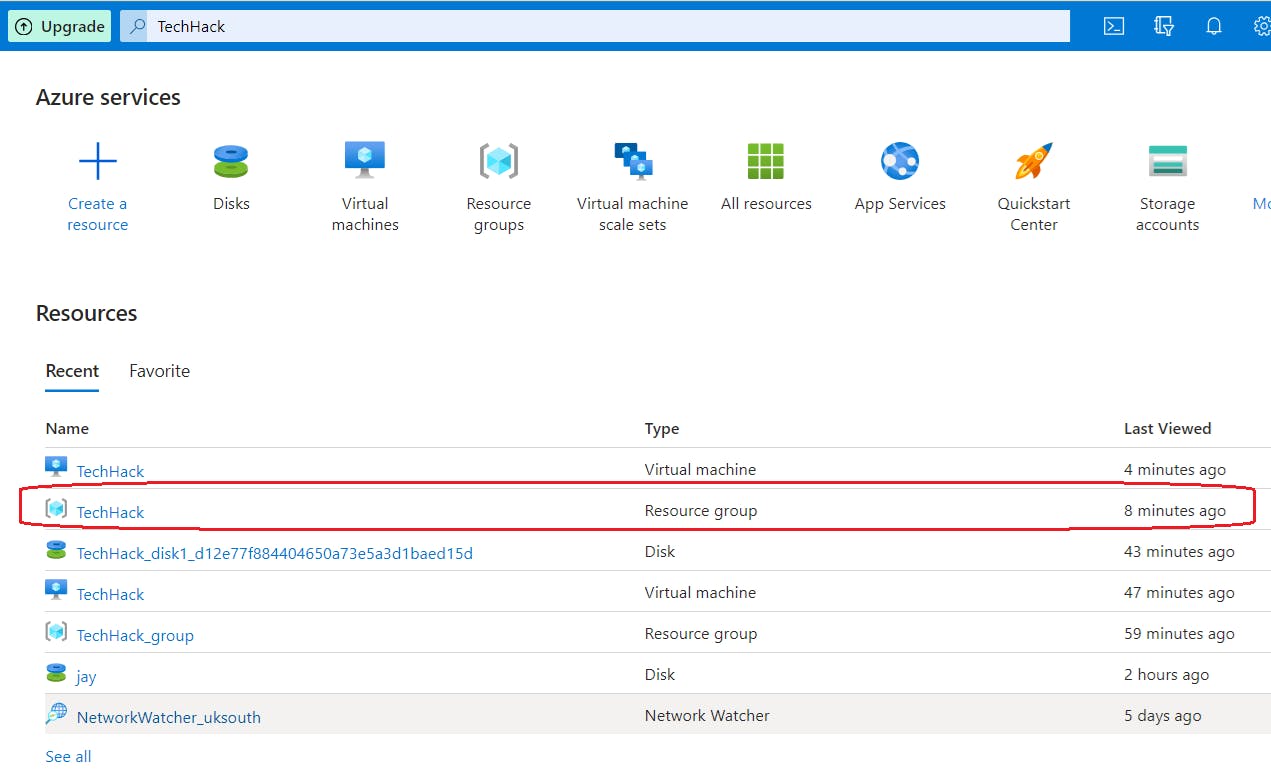
Navigate to Resource Groups: On the left-hand side, select "Resource groups" from the Azure portal's menu.

Select Resource Group: Choose the specific resource group containing the VM and resources you want to delete.
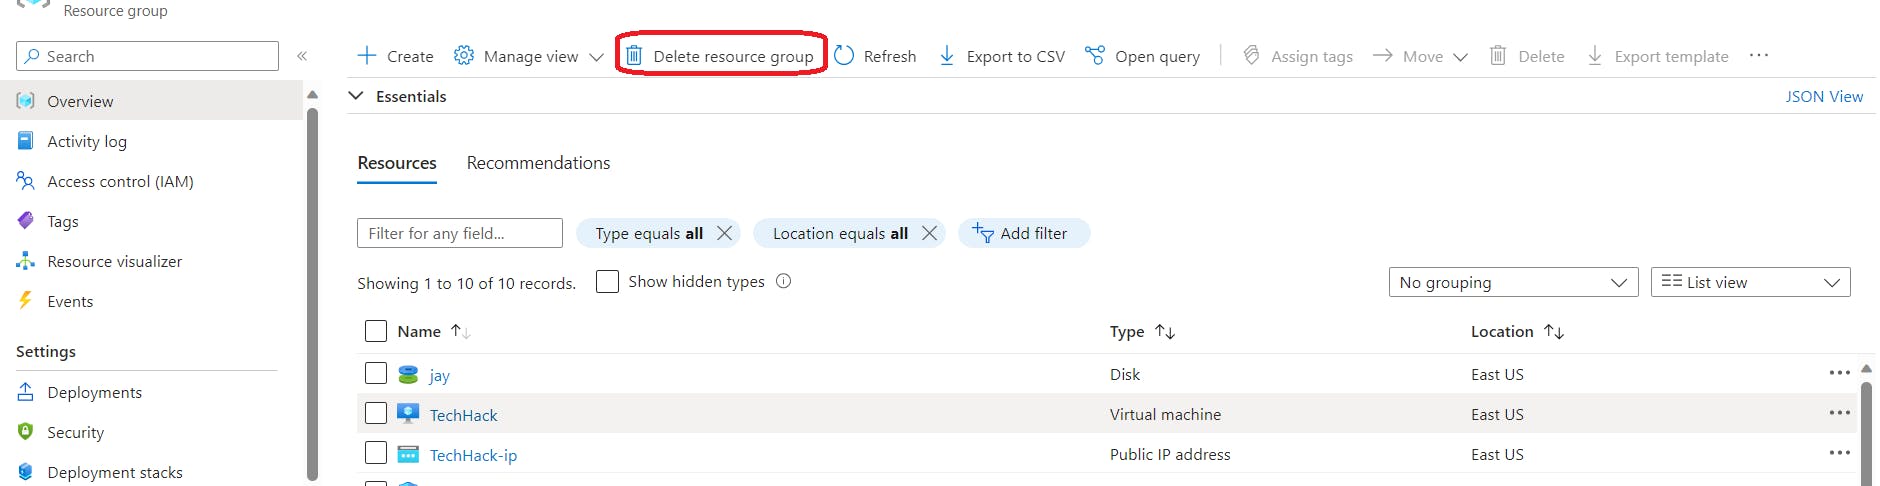
Review Resources: Inside the selected resource group, review all the resources associated with it. Ensure you're aware of everything that will be deleted.
Start Deletion: Click on the "Delete resource group" button at the top. You might be prompted to confirm the deletion. Review the information and confirm the action.
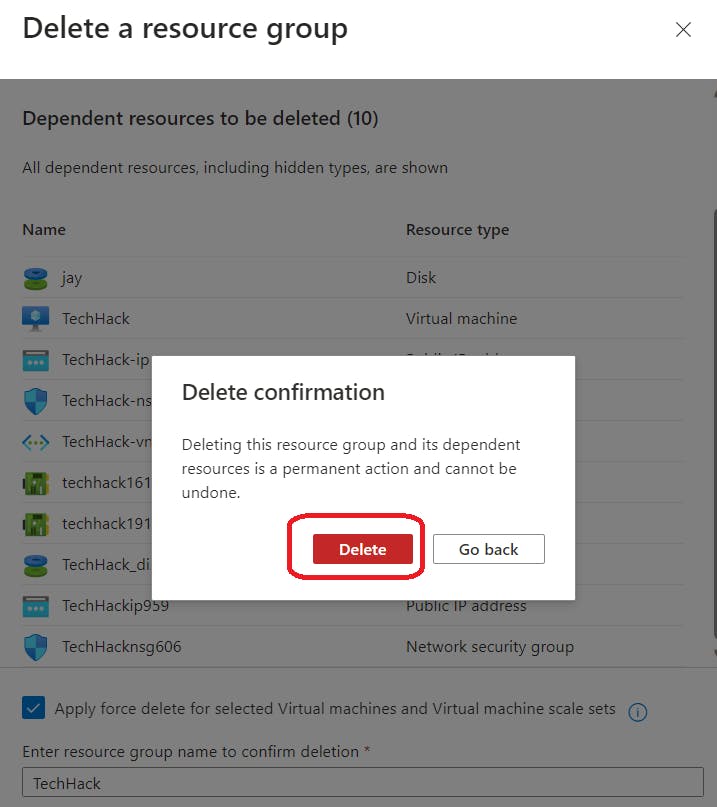
Confirm Deletion: Azure will display a confirmation dialog to verify if you're sure about deleting the resource group and its contents. Review the details and type the resource group's name to confirm the deletion.
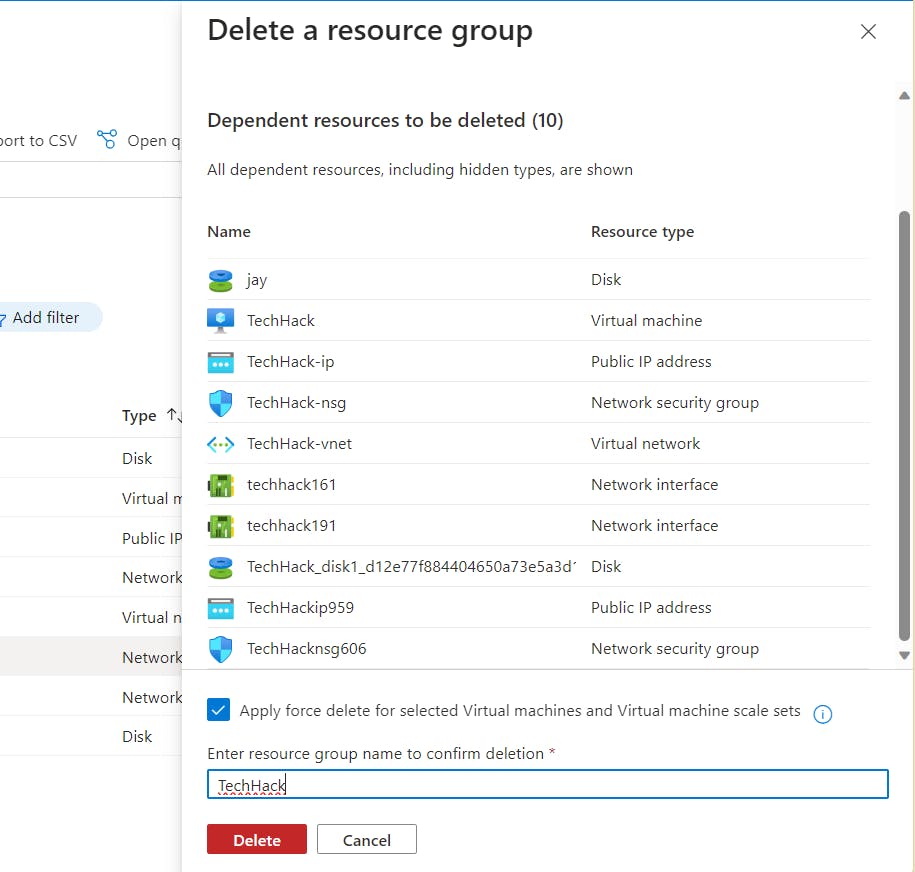
Initiate Deletion: Click on the "Delete" button to initiate the deletion process.
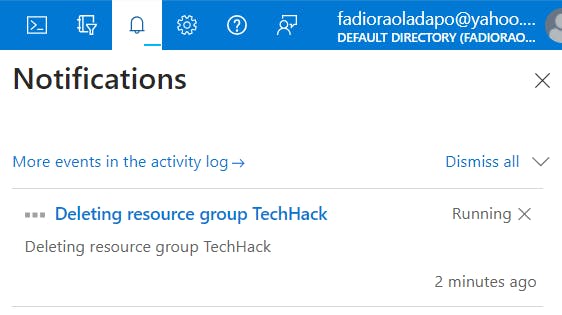
Monitor Deletion Progress: Azure will start deleting the resource group and all associated resources. Monitor the progress on the Azure portal's dashboard. It might take some time, depending on the number of resources.
Verification: Once the deletion process is complete, verify that the resource group and all resources within it have been successfully deleted.

If you've followed these steps, your resources should now be successfully removed, helping you avoid unnecessary charges. Remember, managing your resources efficiently contributes to optimizing your Azure usage and costs.