Welcome to our guide on recovering a mistakenly deleted Virtual Machine (VM) using its OS Disk on Azure. Accidentally deleting a VM can be a distressing experience, but with Azure's powerful capabilities, it's possible to restore your virtual environment and retrieve valuable data. In this tutorial, we'll walk you through the step-by-step process of recovering a deleted VM by utilizing its OS Disk. Whether your VM was removed unintentionally or due to an unforeseen event, this comprehensive guide will assist you in restoring your virtual environment and getting back on track swiftly and efficiently.
For the purpose of this tutorial, we will delete the virtual machine after it has been connected to a disk. The below are the steps to take to recover your virtual machine.
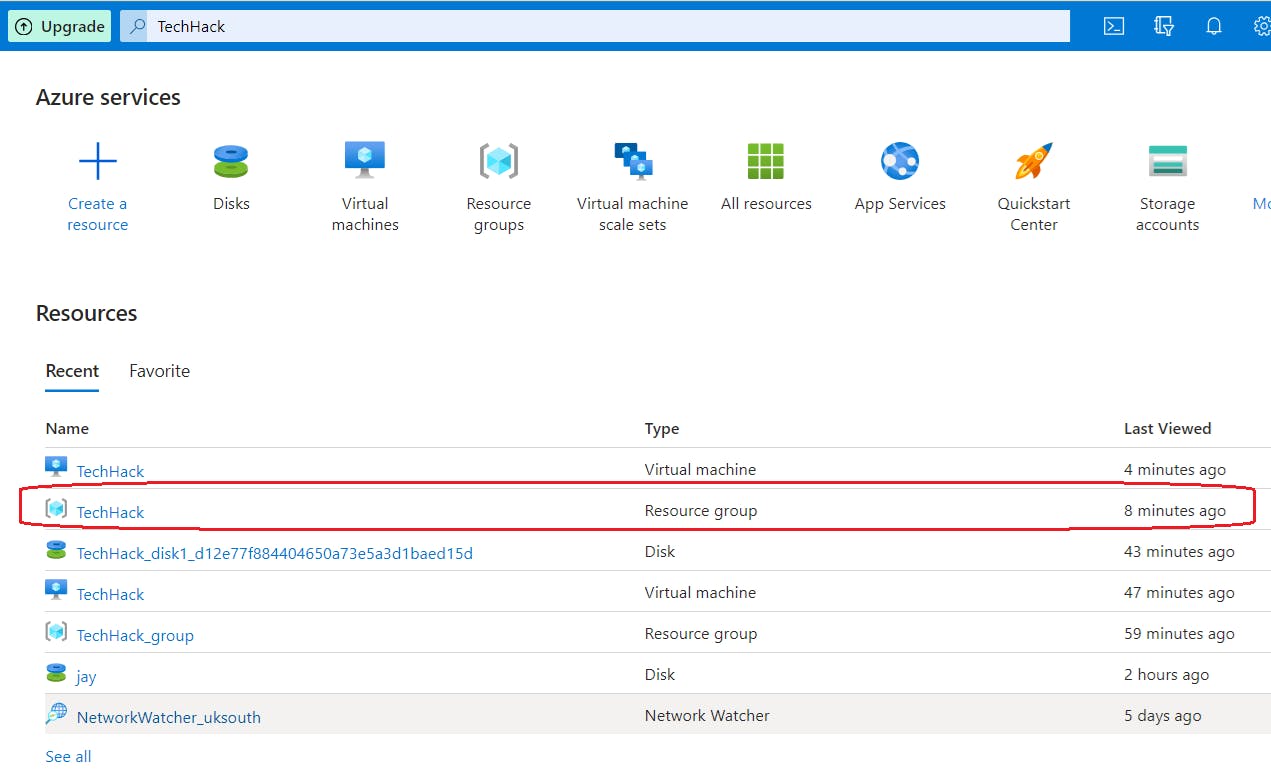
Delete the VM: Assuming the virtual machine was mistakenly deleted or purposely. And the attach disk is still available.

Click on the OS disk: From Home, click disk and select the disk attached to the VM.


Create : click on "create VM".

VM setup: By default, the Resource group, VM name, Region, Image are completed. Edit as required.

Disks: Attach a data disk on the disk tab. Fill in the required information such as Basics, Disks, Networking, Management, Monitoring, Advanced, Tags & Review + create.

Create: On the review + create tab, wait for the validation process to be completed. click the create button.

Verification: Once the new VM is created, verify that it’s operational and functioning as expected by accessing it via Remote Desktop Protocol (RDP) or other preferred methods.

Here's a step-by-step guide to deleting a resource group, including the associated VM and other resources within Azure:
Sign into Azure: Log in to the Azure portal at https://portal.azure.com.
Navigate to Resource Groups: On the left-hand side, select "Resource groups" from the Azure portal's menu.

Select Resource Group: Choose the specific resource group containing the VM and resources you want to delete.

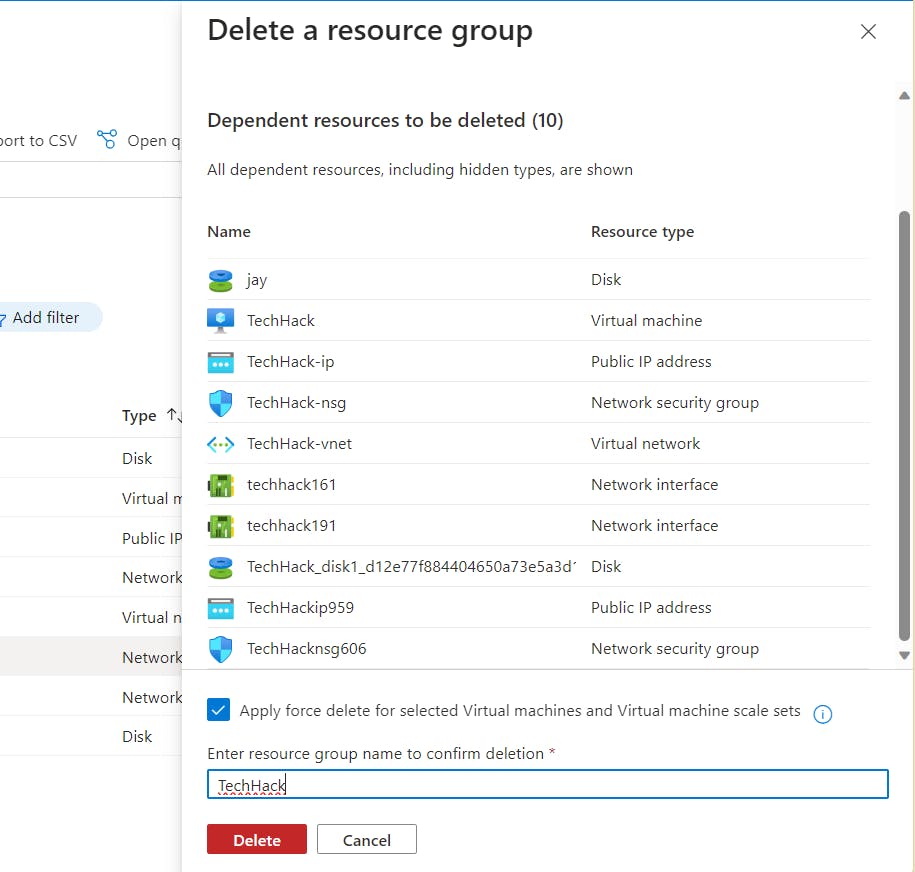
Review Resources: Inside the selected resource group, review all the resources associated with it. Ensure you're aware of everything that will be deleted.
Start Deletion: Click on the "Delete resource group" button at the top. You might be prompted to confirm the deletion. Review the information and confirm the action.

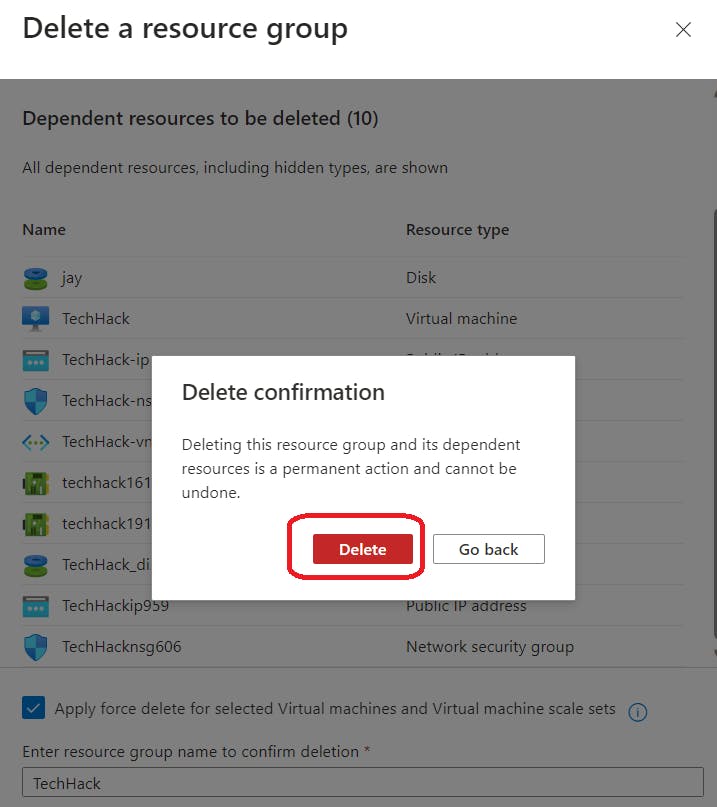
Confirm Deletion: Azure will display a confirmation dialog to verify if you're sure about deleting the resource group and its contents. Review the details and type the resource group's name to confirm the deletion.

Initiate Deletion: Click on the "Delete" button to initiate the deletion process.

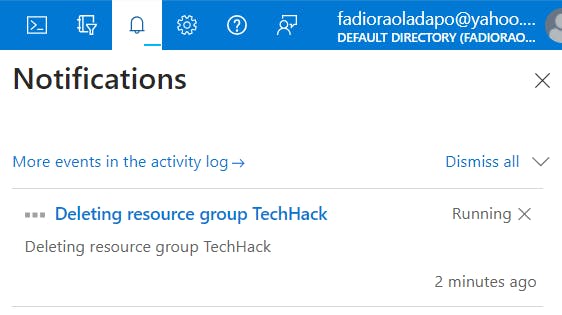
Monitor Deletion Progress: Azure will start deleting the resource group and all associated resources. Monitor the progress on the Azure portal's dashboard. It might take some time, depending on the number of resources.

Verification: Once the deletion process is complete, verify that the resource group and all resources within it have been successfully deleted.

I hope this tutorial has provided a clear and straightforward process for recovering your deleted VM. Kindly subscribe to my blog for further tutorials, updates, and insights on managing Azure resources efficiently. Stay informed and empowered in your cloud endeavors!